
How To Use
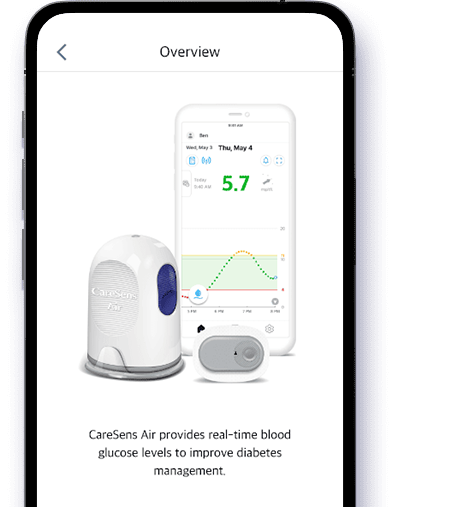
See how easy it is to use CareSens Air, from installing the app to attaching the sensor.
How to use the product
Installing the app and signing up
-
Step 1
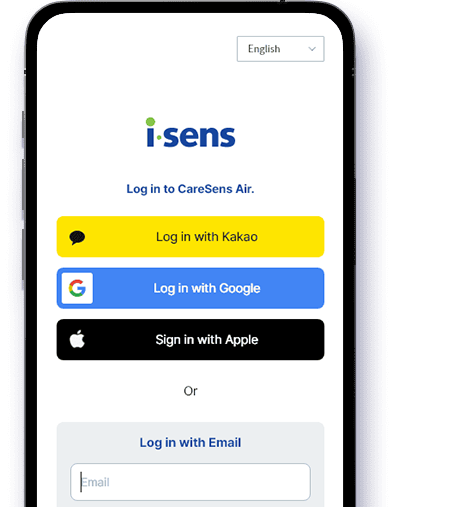 Launch the CareSens Air app on your smartphone and tap Create an account on the unified login screen.※ If you haven't already, download and install the CareSens Air app by searching for it in the App Store or Google Play.
 -
Step 2
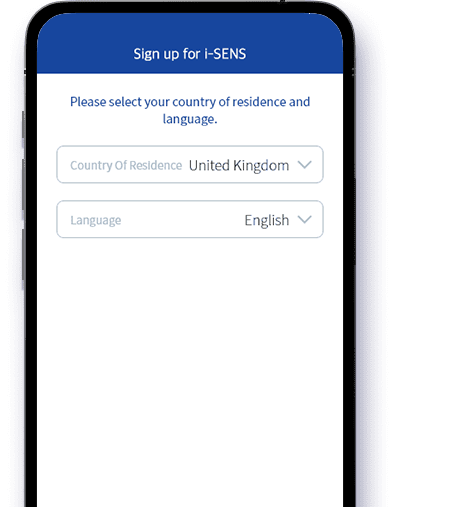 Select your country and language and move on to the next step.
 -
Step 3
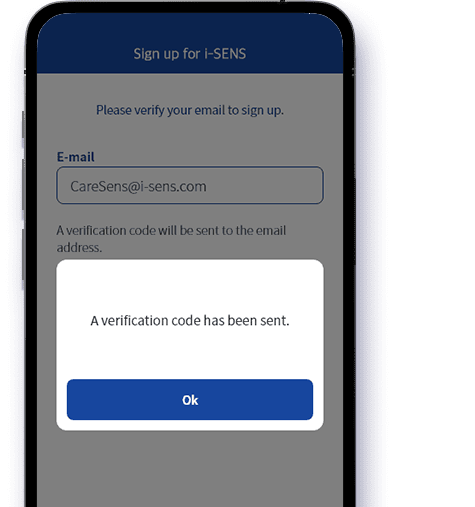 Enter the email address you want to use for your account. A 6-digit verification code will be sent to your email. Enter the code to complete verification.※ Note: The verification code is valid for 5 minutes. Please enter it within this timeframe to complete your sign-up.
 -
Step 4
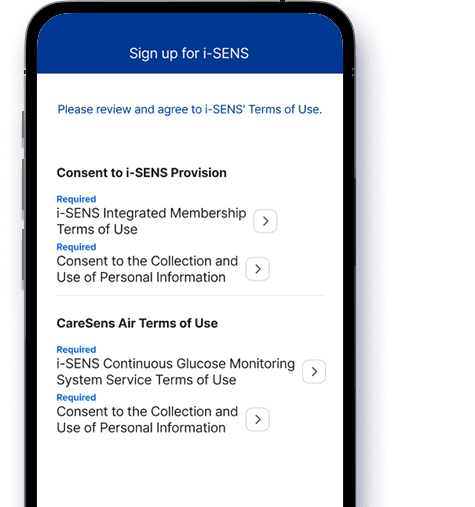 Read the terms and conditions, select whether you agree, and move on to the next step.
 -
Step 5
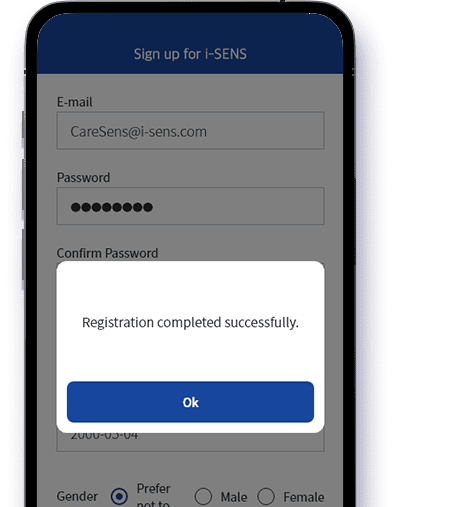 Enter your user information and press Confirm to complete your registration.
Connecting to a sensor
-
Step 1
 Login to the CareSens Air user app on your smart device and tap Safety information, then tap Scan Sensor Information.
 -
Step 2
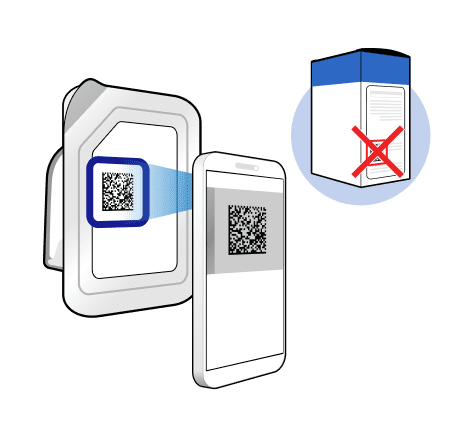 On the 'Scan Sensor Information' screen, scan the barcode on the package label. You can manually enter the barcode instead by tapping Enter Manually.※Enter the information exactly as it appears on the sensor package label.
If you enter the serial number and pin code incorrectly, the sensor will fail to connect. -
Step 3
 Follow the steps on the screen to attach the sensor on the back of your upper arm, and tap Start Pairing.※Before attaching the sensor, be sure to review the detailed sensor attachment instructions in the manual or tutorial video.
 -
Step 4
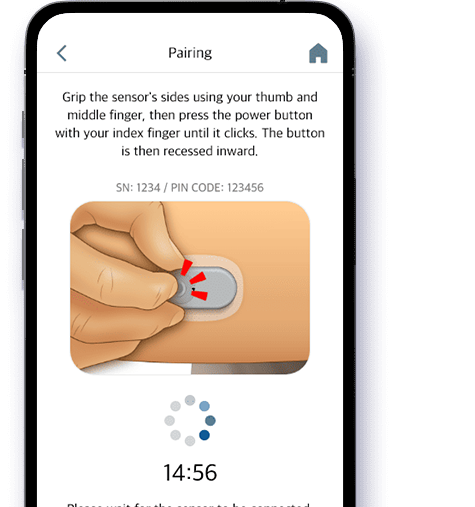 Press the power button on the sensor firmly until it is recessed to connect the sensor.
When the sensor is successfully connected, the alert settings screen appears.※In the case of iOS, you need to enter the pin code according to the Bluetooth connection request. -
Step 5
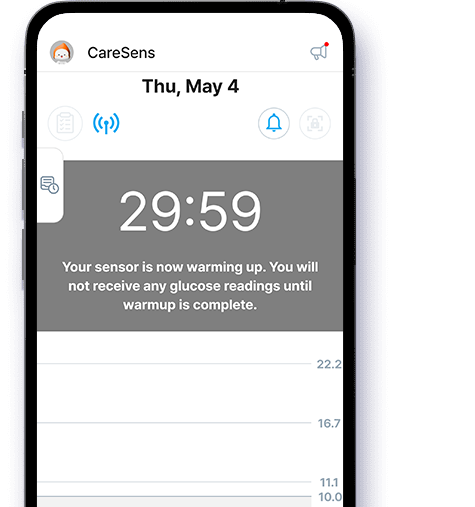 Once you finish configuring the alert settings, the sensor warmup period of 30 minutes begins.
Attaching the sensor
-
Step 1
 Open the CareSens Air sensor package. Wash your hands well with soap and running water, and dry them with a clean cloth. Take the applicator out of the package and set it on a flat, stable surface.※ Check the expiration date on the sensor package label before opening the package.
 -
Step 2
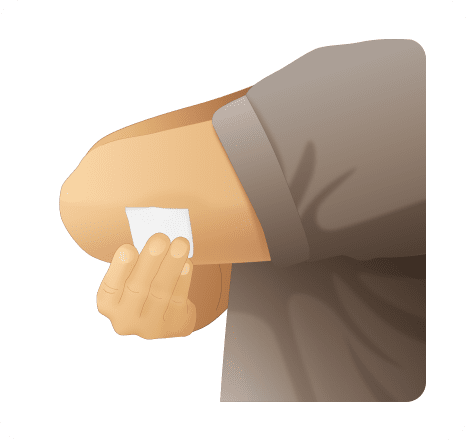 Wipe the area where the sensor will be attached to the skin with an alcohol swab and wait for it to dry completely.
 -
Step 3
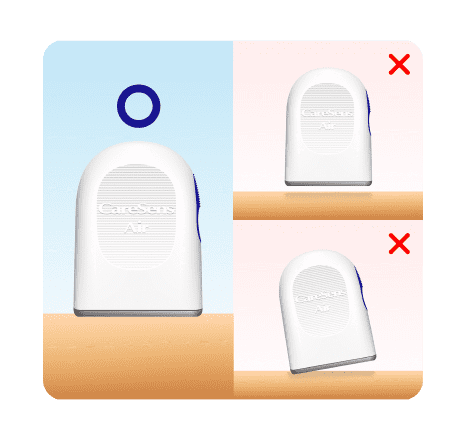
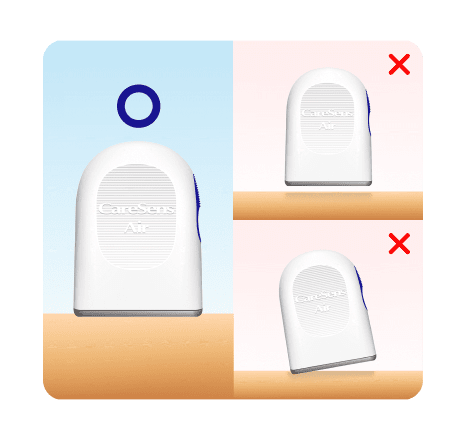 Remove the safety cap and place the applicator horizontally on the back of your upper arm, where the sensor will be attached.※ Do not press the release button on the applicator until you are ready to attach the sensor.
 -
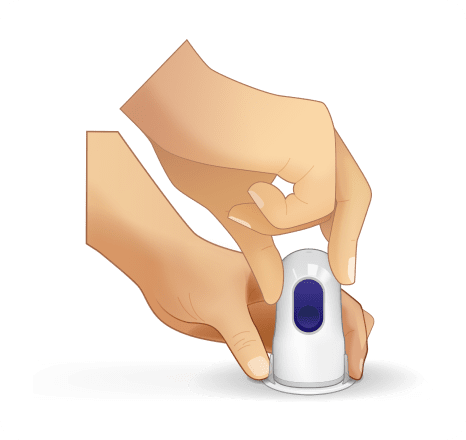
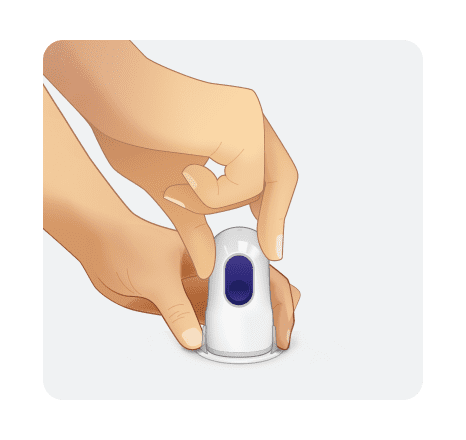
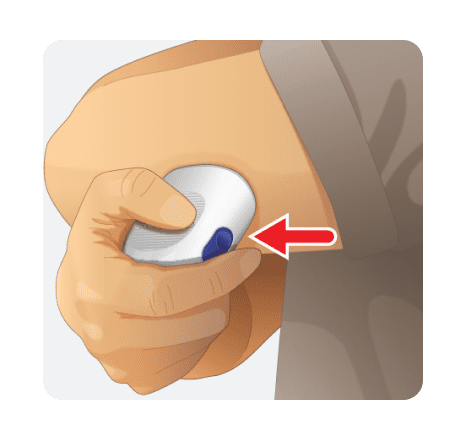
Step 4
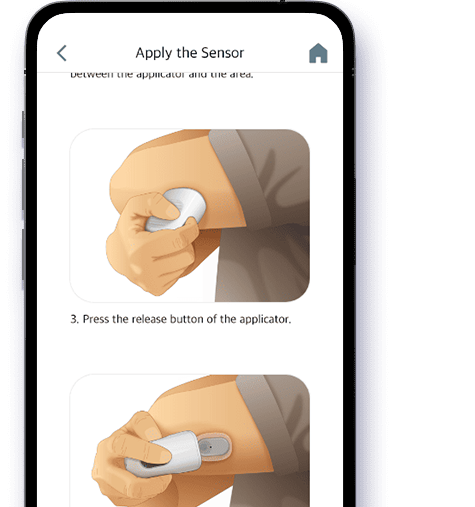
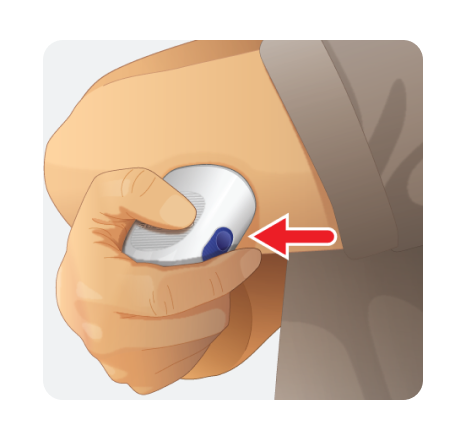 Press the Release button on the applicator. The sensor is then released from the applicator and can be attached to the back of your upper arm.
 -
Step 5
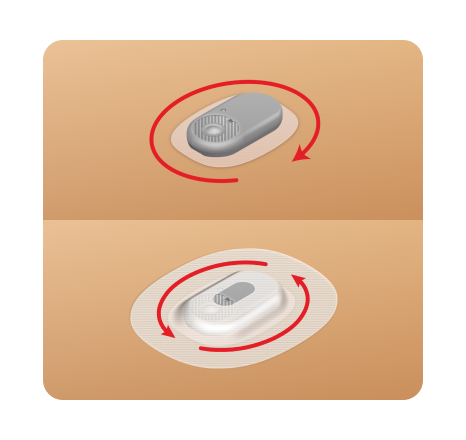 Remove the applicator and make sure that the sensor has been properly attached. After attaching the sensor, sensor tape can be attached to prevent the sensor from being easily removed from the attachment area.
Alert settings
-
Step 1
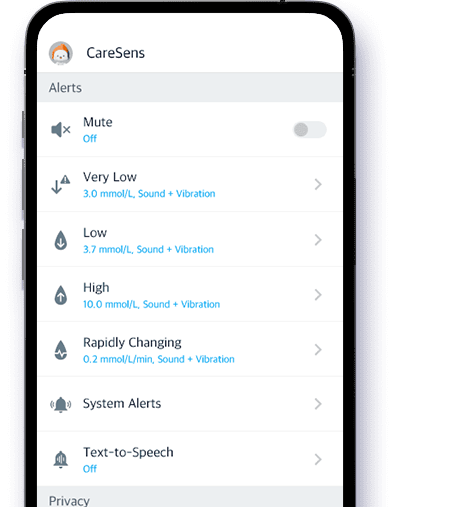 Set your glucose alert levels in Settings.
 -
Step 2
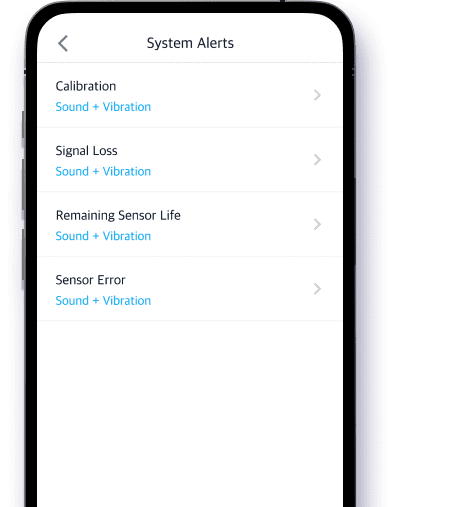 Under System Alerts, you can choose whether to receive alerts such as Signal Loss, Remaining Sensor Life, Sensor Error, Signal anomaly detected.
 -
Step 3
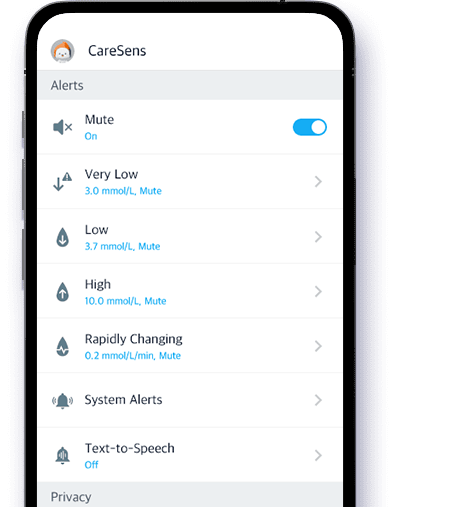 Set to Mute as needed, which will silence all alerts.
How to use the product
Step 1
Launch the CareSens Air app on your smartphone and tap Create an account on the unified login screen.
※ If you haven't already, download and install the CareSens Air app by searching for it in the App Store or Google Play.
Step 2
Select your country and language and move on to the next step.
Step 3
Enter the email address you want to use for your account. A 6-digit verification code will be sent to your email. Enter the code to complete verification.
※ Note: The verification code is valid for 5 minutes. Please enter it within this timeframe to complete your sign-up.
Step 4
Read the terms and conditions, select whether you agree, and move on to the next step.
Step 5
Enter your user information and press Confirm to complete your registration.


Step 1
Login to the CareSens Air user app on your smart device and tap Safety information, then tap Scan Sensor Information.
Step 2

On the 'Scan Sensor Information' screen, scan the barcode on the package label. You can manually enter the barcode instead by tapping Enter Manually.
Enter the information exactly as it appears on the sensor package label.
If you enter the serial number and pin code incorrectly, the sensor will fail to connect.
If you enter the serial number and pin code incorrectly, the sensor will fail to connect.
Step 3
Follow the steps on the screen to attach the sensor on the back of your upper arm, and tap Start Pairing.
Before attaching the sensor, be sure to review the detailed sensor attachment instructions in the manual or tutorial video.
Step 4
Press the power button on the sensor firmly until it is recessed to connect the sensor.
When the sensor is successfully connected, the alert settings screen appears.
When the sensor is successfully connected, the alert settings screen appears.
In the case of iOS, you need to enter the pin code according to the Bluetooth connection request.
Step 5
Once you finish configuring the alert settings, the sensor warmup period of 30 minutes begins.
Step 1
Open the CareSens Air sensor package. Wash your hands well with soap and running water, and dry them with a clean cloth.
Take the applicator out of the package and set it on a flat, stable surface.
Take the applicator out of the package and set it on a flat, stable surface.
Check the expiration date on the sensor package label before opening the package.

Step 2
Wipe the area where the sensor will be attached to the skin with an alcohol swab and wait for it to dry completely.
Step 3
Remove the safety cap and place the applicator horizontally on the back of your upper arm, where the sensor will be attached.
Do not press the release button on the applicator until you are ready to attach the sensor.
Step 4
Press the Release button on the applicator.
The sensor is then released from the applicator and can be attached to the back of your upper arm.
The sensor is then released from the applicator and can be attached to the back of your upper arm.
Step 5
Remove the applicator and make sure that the sensor has been properly attached.
After attaching the sensor, sensor tape can be attached to prevent the sensor from being easily removed from the attachment area.
After attaching the sensor, sensor tape can be attached to prevent the sensor from being easily removed from the attachment area.
Step 1
Set your glucose alert levels in Settings.
Step 2
Under System Alerts, you can choose whether to receive alerts such as Signal Loss, Remaining Sensor Life, Sensor Error, Signal anomaly detected.
Step 3
Set to Mute as needed, which will silence all alerts.
Watch how to use the product
-
Getting Started with the CareSens Air
-
How to Remove and Replace
the CareSens Air Sensor
-
 CareSens Air App User Guide
-
CareSens Air App User Guide
-
-
 Sens365 App User Guide
-
Sens365 App User Guide
-
-
 Sens365 Web User Guide
-
Sens365 Web – General Mode
-
Sens365 Web – Healthcare Professional Mode
-